Hi everyone :-)
I know you would've been wondering "where the heck did this girl disappear!!??" hai na? :P :D What to do guys..My system is having a lots of problems lately..i was getting it repaired so wasn't able to post regularly.Now my system is back..i hope it won't cause any other new trouble now and i can post all the pending reviews and looks. :-)
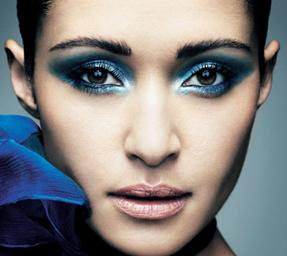
Many days ago i submitted this entry for Makeupgeek's "spring colours" contest.
Some of you requested me to do a tut on how i did that extreme bold winged eyeliner.In the above look i first used an aqua coloured eye pencil and then used a matte black eyeshadow on top of it.So today i'm going to do a photo tutorial on how to do this kind of extreme winged eye with the help of a pencil liner and an eyeshadow.
Products required:
1) A black pencil liner.(or you can use any colour you want as a base liner just like i did in the above look)
2) A matte black eyeshadow.
3) A kohl/kajal.(You can use the same pencil liner if it is water line safe)
4) A jet black mascara.
While doing this kind of liner where a dark powder eyeshadow is used it is best to apply your foundation later.
Step 1: Start with bare/primed eyes (or you can do your desired eye makeup first and do this liner as a final step just like i did in the above contest look).Just place your ring finger on your eyelid and pull it slightly upwards like shown in the pic.This help you to apply the liner closest to your lashes there by avoiding the flesh from peeking through the dark line.
Step 2: Now take the black pencil liner and draw a line all along the upper and lower lashline.
Step 3: Run your ring finger allover the applied liner to smudge it slightly.This helps to correct any uneven lines and provides an even base for our next step.
Step 4: Take the liner pencil and make sure that it's tip is nicely sharpened (Sharp enough to draw a thin line..if it is too sharp then it will hurt a lot if you accidentally poke your eye with it! so be careful.) Now place the tip of the pencil right at the point where your upper lid meets youe lower one near the inner corner.
Step 5: Draw a thin line going towards your nose following the angle of your upper lid at which it is coming down.(did that make any sense? :P )
Step 6: Next make a triangle by drawing another line as shown in the pic and fill it in.
Step 7: Now follow the same method to create the wing at the outer corner.
TIP: Here is the fool proof method to create a perfect outer wing with a pencil/gel liner! Take the nicely sharpened liner pencil or a thin brush(in case of gel liner) and keep it right at the corner/point where your upper lid meets your lower one near the outer corner and shut your eyes once.Now while shutting your eye the skin comes down letting your pencil to glide in an angle going towards your brow.This line serves as a perfect guide to make a winged eye! Just draw another line joining our 'guide' line and the line on the upper lash line.Fill it and adjust it as required and you are ready with your perfectly winged eyes. ;-)
Correct any uneven lines or stray lines or smudges with a pointed Q-tip (dry or dipped in makeup remover).Now the base is ready.
Step 8: Take an angled brush and a matte black eyeshadow.Apply it all along the shape we created by pressing it on to the liner so that the colour is intense and locks down the creamy liner.After then you can swipe the brush at the edges to create a crisp and neat line.Also you can adjust the length and shape of the wings.Then apply kohl/pencil liner/gel liner to both your upper and lower waterline.
Step 9: Apply loads of jet black volunising mascara to your upper lashes.( In the contest entry i applied mascara to the lower lashes too.Here i didn't.You can apply it if you want.) If you have false lashes then pleasse don't forget to put em on! <3
So here's the finished look:
Hope this Tutorial was useful. :-)
Products used:
1) Avon perfect wear kajal pencil.
2) Inglot eyeshadow no.63.
3) Shahnaz hussain kajal (for waterline).
4) Avon super shock mascara.
Love,
Siri.


